Quick start
Everything from your first login to live meter reads and alerts, in five steps. There are no configuration files, no enrollment codes to type, and nothing to open on the customer's firewall. Each step tells you what to click, what you should see, and what to do if you don't see it.
Before you start
- Your setup email from
alerts@meterbeam.com. It's sent the moment your trial starts. - One always-on computer on the same network as the printers. Windows 10/11 or Windows Server 2016+ (Linux works too). A server, a front-desk PC that never turns off, or a small mini-PC are all fine. This is where the collector will live.
- Administrator rights on that computer, so you can run the installer.
- The printers powered on. The collector finds them itself; most office printers have SNMP turned on out of the box.
Nothing to open on the firewall. The collector only makes outbound HTTPS connections (TCP 443) to app.meterbeam.com. No port forwarding, no VPN, no inbound rules.
1. Log in to the portal
Do this
- Open the email from alerts@meterbeam.com and click the setup link.
- Choose a password (8 characters minimum).
- Sign in at app.meterbeam.com.

You should see
The Dashboard. On a brand-new account there's nothing on it yet; it fills in once your first collector reports (step 4).
If not
No email? Check spam for alerts@meterbeam.com and whitelist it now; it's also the address your toner and service alerts will come from. Link expired? Use Forgot password? on the sign-in page to get a fresh one.
2. Create your first site
A site is one physical location with its own network: one customer office, one branch, one building. Each site gets its own collector, so if a customer has two offices, that's two sites.
Do this
- Click Sites in the top bar.
- Type a name in the New site name box. We suggest Customer — Location, like
Lakeshore Dental — Downtown. It's what you'll see in every alert. - Press Add site.
- Click the new site's name to open its page.

You should see
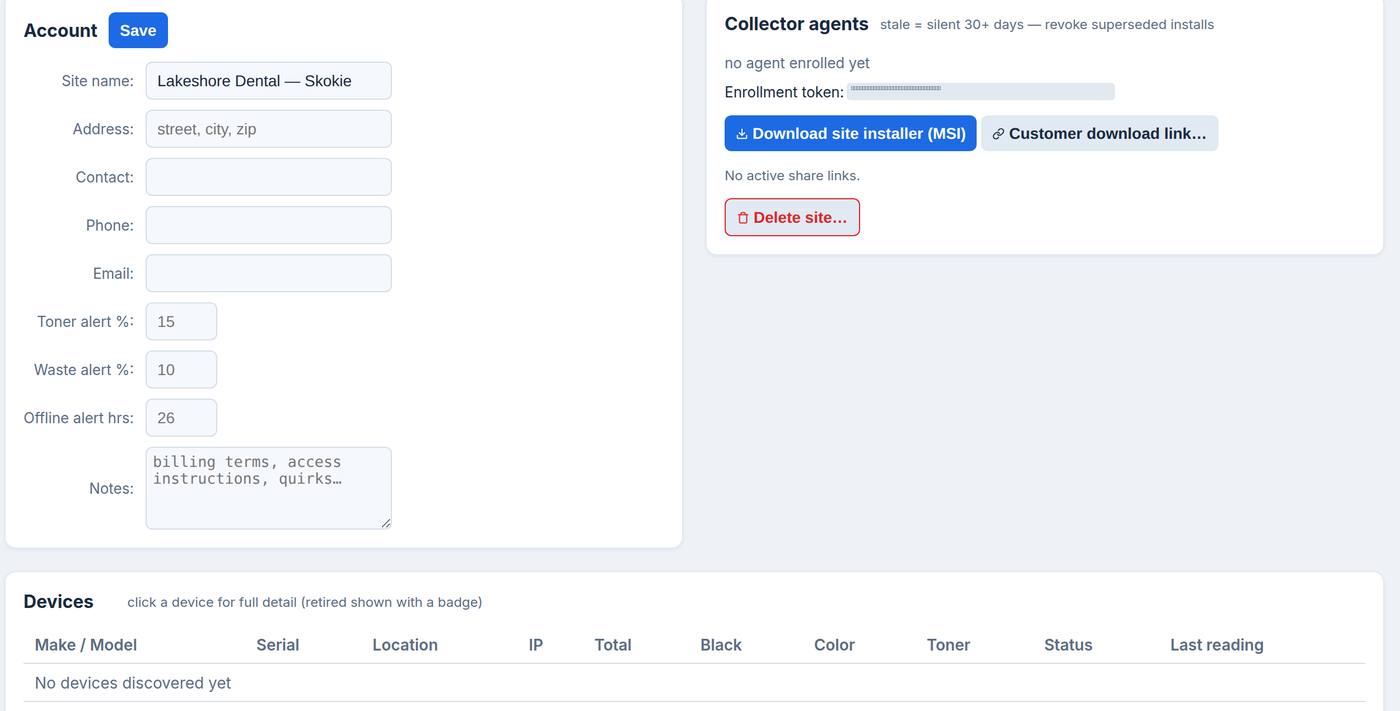
The site's own page: an Account panel on the left, a Collector agents box on the right with the installer buttons, and "No devices discovered yet" below. Address, contact and phone are optional; fill them in now or later. The only thing the next step needs is for the site to exist.
3. Install the collector
The collector is a small background service. It runs on the computer you picked, finds the printers on that network, reads their meters and toner levels, and reports to MeterBeam. One collector covers the whole site.
Do this
- On the site page, under Collector agents, click Download site installer (MSI).
- Copy the file to the always-on computer.
- Right-click it and choose Run as administrator. Click through the installer; there is nothing to type. The installer is already tied to this site.
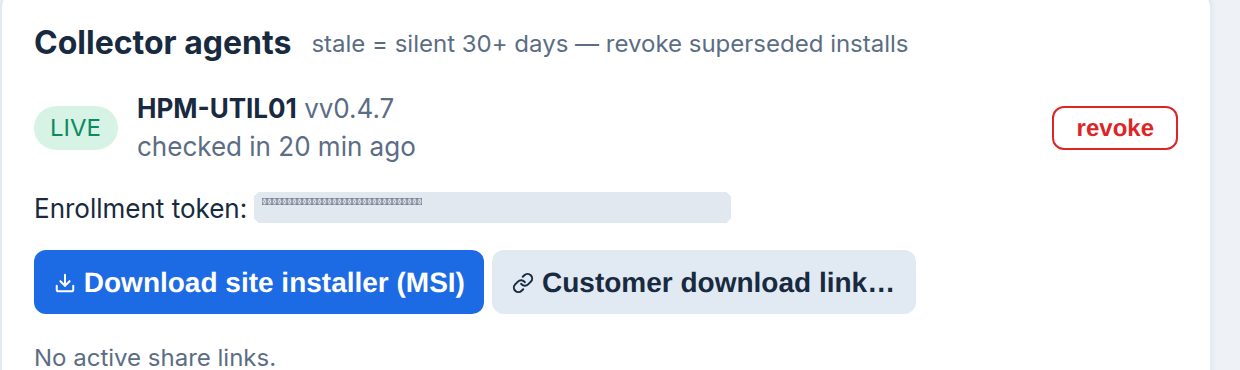
Not at the customer's office? Click Customer download link… instead. It creates a time-limited link you can email to their IT contact. They can download only that site's installer, and they don't need a portal login. Something like: "Please run this on a computer that stays on. It takes about a minute and doesn't need any configuration."
Linux host? The collector also ships as a Linux service. See Install the collector.
You should see
The installer finishes in about a minute and starts a Windows service called MeterBeamAgent (you can check it in Task Manager → Services). Within a minute or two, back in the portal, the site's collector row turns LIVE and shows the computer's hostname, the collector version, and "checked in … ago". The service starts automatically and survives reboots.
If not
Give it five minutes. Still nothing? Confirm the computer has internet access and that outbound HTTPS (port 443) to app.meterbeam.com isn't blocked by a web filter. Then see What healthy looks like.
4. Watch devices appear
You don't add printers by hand. Once the collector is live it scans the site's network for anything that answers SNMP as a printer, and the Devices table starts filling in on its own. A first full scan of a typical office takes under a minute.
You should see
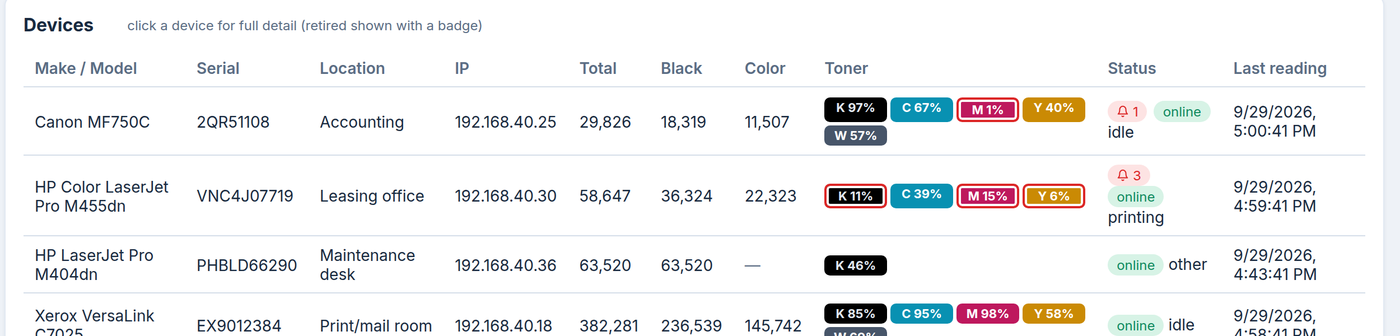
One row per printer, with Total, Black and Color counts, toner percentages, a status of online, and a Last reading timestamp from the last few minutes. Click any row for supply bars and reading history.
If not
A printer you expected is missing? Nine times out of ten it's one of two things: SNMP is turned off on that printer, or it sits on a different VLAN than the collector. Both fixes are in Device discovery & troubleshooting. A printer shows up but with no meters? Same page, second section.
5. Set the site's alert rules
Alerts are on from the start. This step is about making sure they fire at the right time for this site, and that you know where they'll land.
Do this
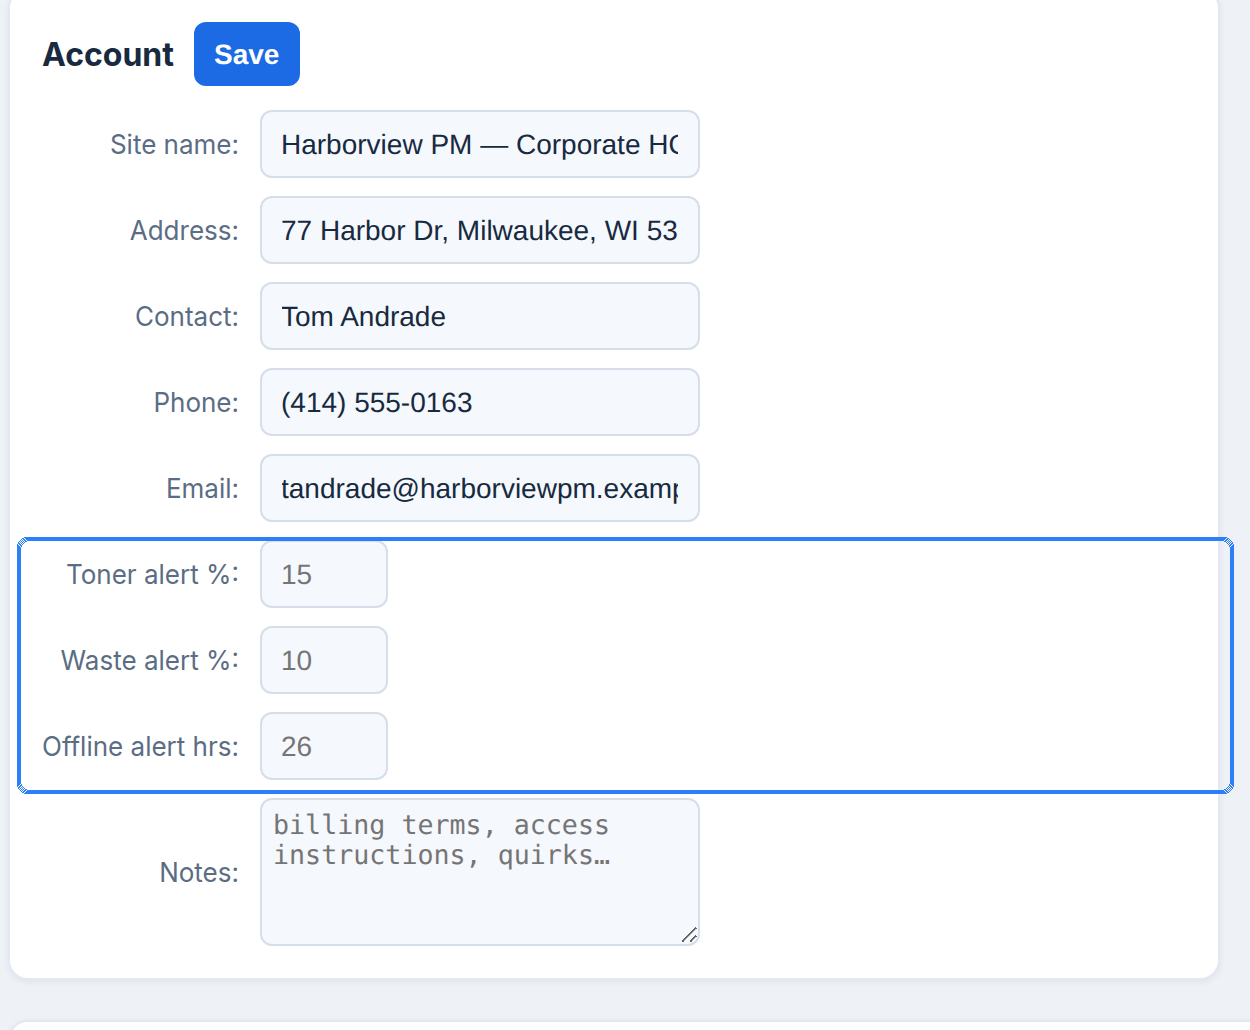
- On the site page, in the Account panel, check the three alert fields:
- Toner alert %: you're alerted when a cartridge drops below this. Default 15.
- Waste alert %: the same for the waste toner box. Default 10.
- Offline alert hrs: how many hours of silence before "collector down" and "device offline" alerts. Leave it blank for the standard default. If the collector runs on a PC that's switched off nights and weekends, raise it (80 is a good number) so you don't get a false alarm every Monday morning.
- Fill in the site's Contact, Phone and Email so whoever picks up an alert knows who to call.
- Click Save.
You should see
The values you entered still there after you click Save and reload. That's it. Toner-low, waste-full, device-offline and collector-down alerts will now go out for this site on those rules.
Where alerts go. Alert emails come from alerts@meterbeam.com and go to the address your MeterBeam account was set up with. Want them sent somewhere else, or to more than one person? Email info@meterbeam.com and we'll update it.
You're done when
- The Dashboard shows your site with its collector healthy.
- The site page shows the collector as LIVE, checked in minutes ago.
- The Devices table lists your printers with page counts and toner percentages.
- The site's alert thresholds are saved, and you know which inbox alerts go to.

What happens next
- MeterBeam polls every device roughly hourly and keeps the full reading history.
- After a few days of readings it has enough burn-rate data to forecast days left per cartridge, which drives the Supplies view and the ship-now decisions on the Dashboard.
- Meter deltas roll up into the Volume report for billing, with CSV export.
- Don't skip this: if the customer keeps spare cartridges on site, add each one to the site's shelf with a minimum quantity now. MeterBeam can only warn you about low shelf stock for items it knows exist.
Adding your next site
Repeat steps 2 and 3 for each location: create the site, download that site's installer, run it on a computer there. Every site has its own installer; don't reuse one site's MSI at another. New sites start alerting as soon as their collector is live; set their thresholds the same way (step 5).